

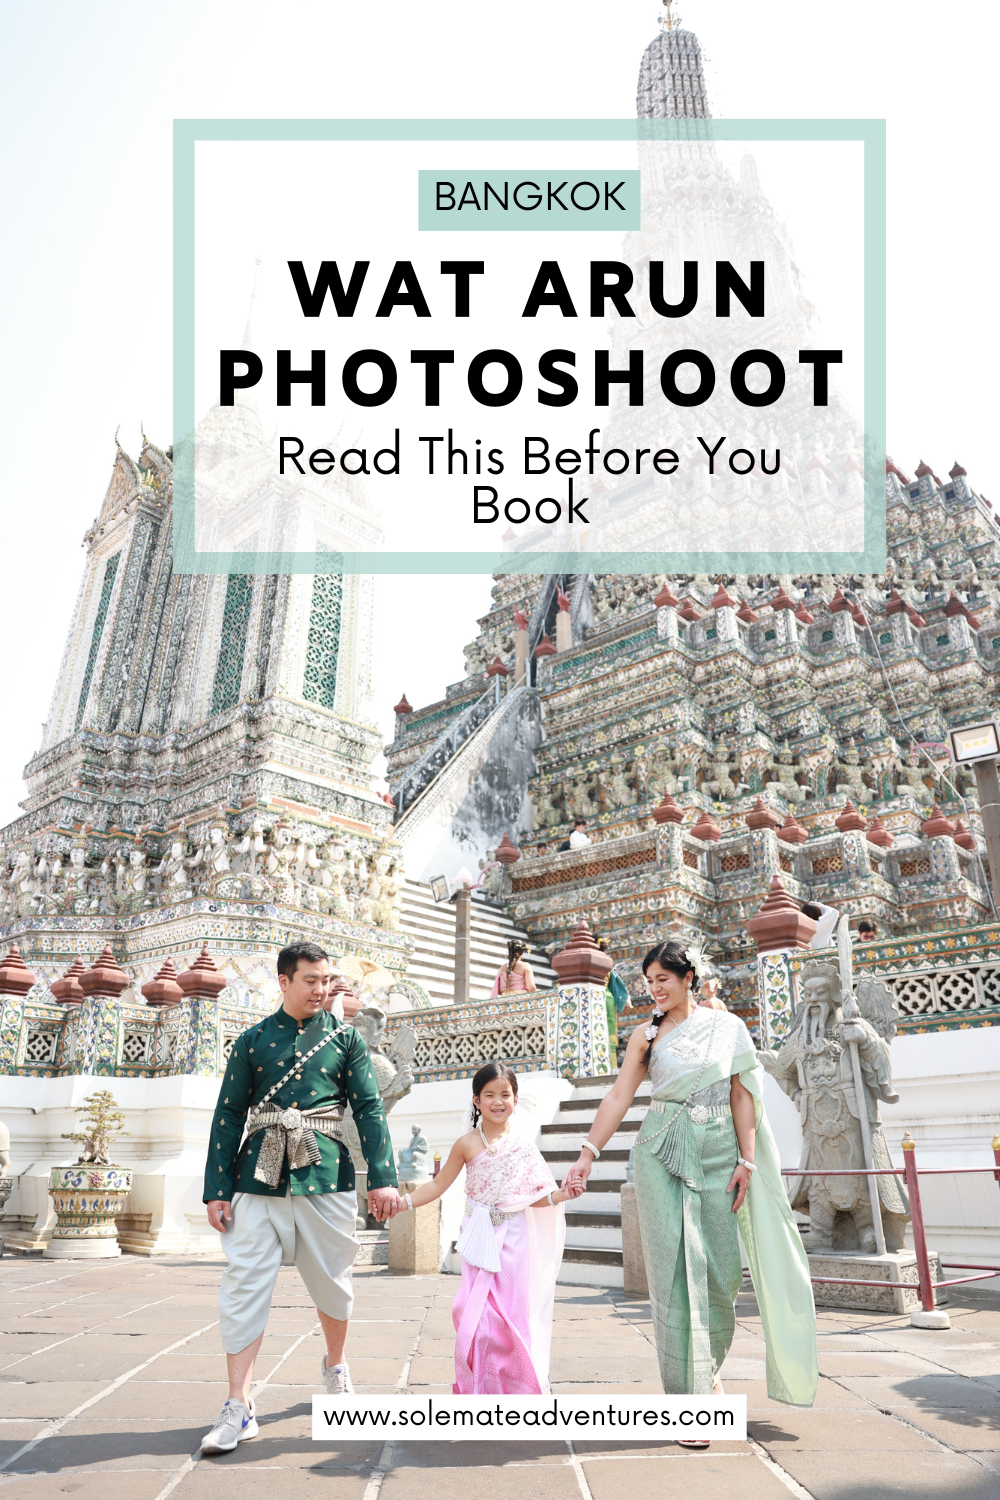
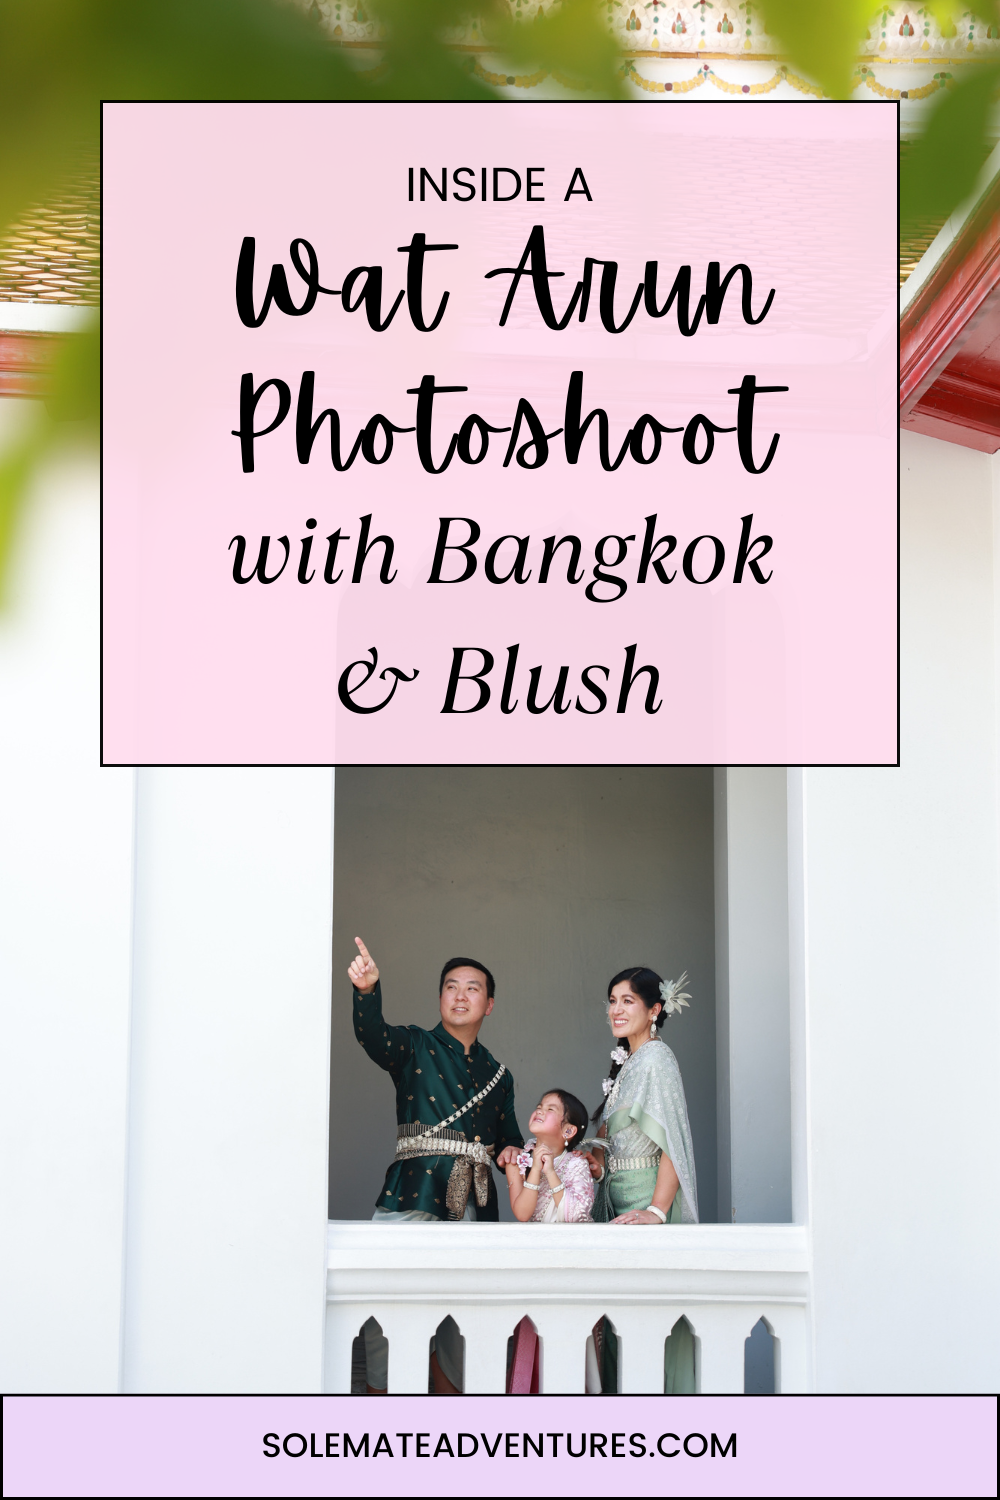
If you have a few days in Bangkok, a Wat Arun photoshoot is a great opportunity to try dressing up in traditional Thai attire while getting some gorgeous photos at one of Bangkok’s most famous temples! In this review, we’re sharing our experience booking a Thai costume rental and Wat Arun photoshoot with Bangkok & Blush, including the cost, what to expect, and whether we think it’s worth it.
Disclosure: This post may contain affiliate links, meaning that if you purchase something after clicking one of these links, we may earn a small commission, at no extra cost to you. As an Amazon Associate, we earn from qualifying purchases.
Quick Verdict
| Our Rating: | ★★★★★ (5/5) |
| Worth it? | Yes! |
| Best for: | Couples, families, solo travellers, and honeymooners |
| Price: | 3250 THB ($97 USD) for our family of three |
Wat Arun Overview
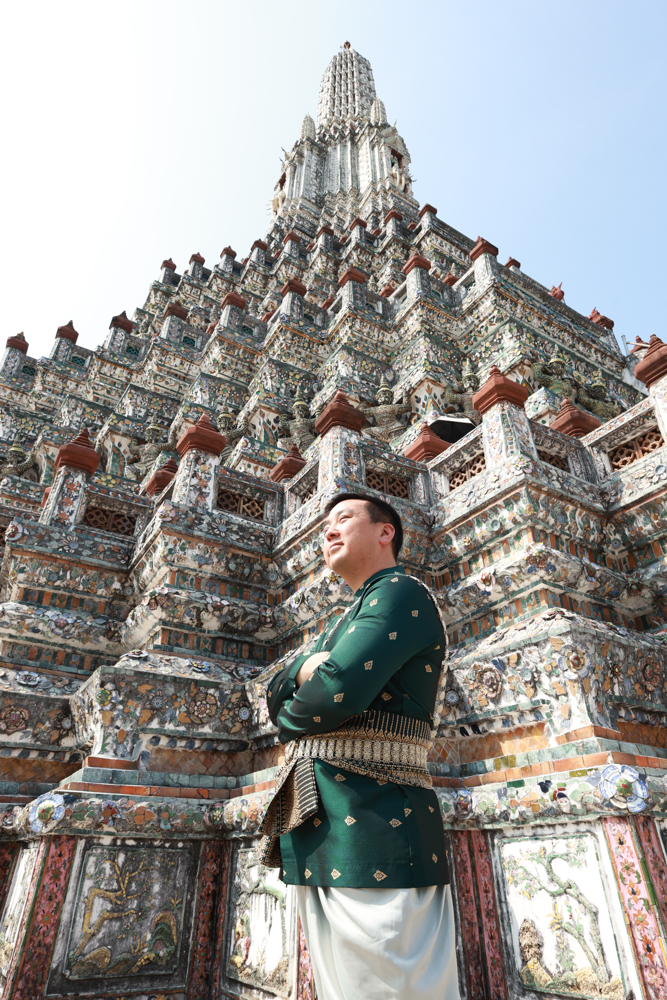
Wat Arun, also known as the Temple of Dawn, is one of Bangkok’s most famous and recognizable landmarks, standing tall next to the Chao Phraya River. Its colorful, ornately decorated spires make it one of the city’s most photographed attractions.
Hours: 8am-6pm Daily
Cost: 200 THB per adult (foreigner) *Cash Only*
Why We Decided To Book a Wat Arun Photoshoot
We had planned to visit at least one of Bangkok’s famous temples during our three days in Bangkok, and when we saw how inexpensive it was to rent traditional Thai dresses and book a Wat Arun photoshoot, we figured why not?!
We had done a similar photoshoot in kimonos during a previous trip to Tokyo and loved how the photos turned out, so we thought it would be fun to do it again in Bangkok.
Booking Our Wat Arun Photoshoot
There are so many Thai dress rental studios near Wat Arun, all offering similar packages with costume rentals, hair and makeup, and photographers. It’s difficult to decide which one to book, or if you should even book ahead at all.
After reading numerous Google reviews for a bunch of different shops near Wat Arun, I decided to book with Bangkok & Blush.
I liked that it was easy to book with them online, they had customizable packages, were very reasonably priced, had a good selection of kids attire, and we were able to secure an early timeslot. You can book directly with them through their website or via Klook.
We decided to book with them directly as it was a bit cheaper. We only had to pay a 300 THB deposit online and were able to secure the earliest timeslot of 8am. The remainder of the invoice was due upon arrival at the shop. They prefer cash but allowed me to pay with my credit card via a link they emailed to me.
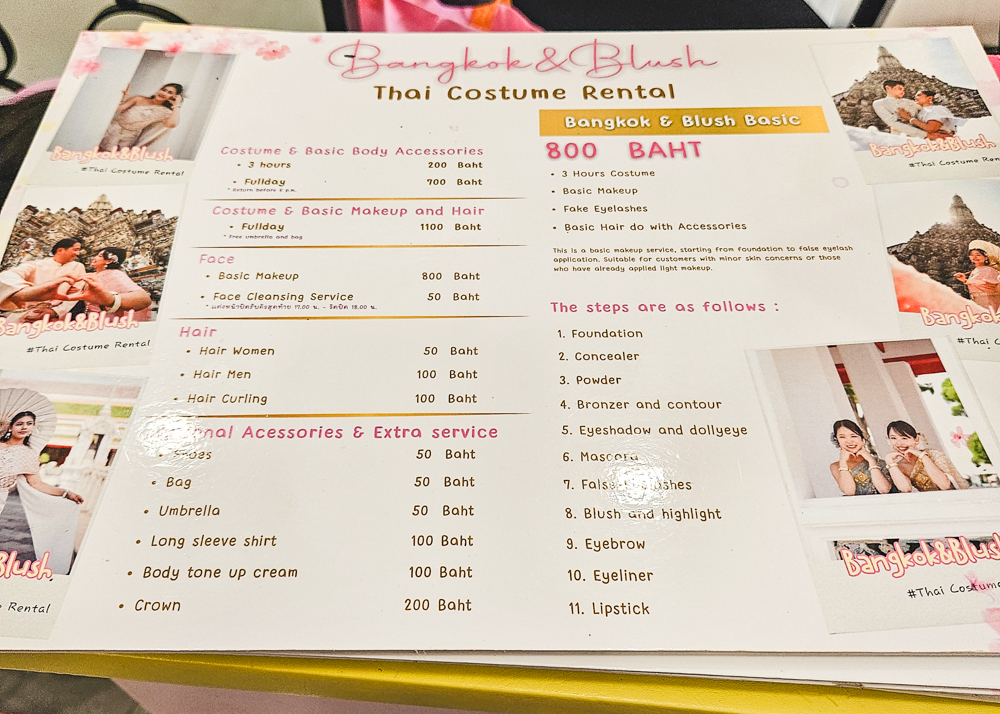
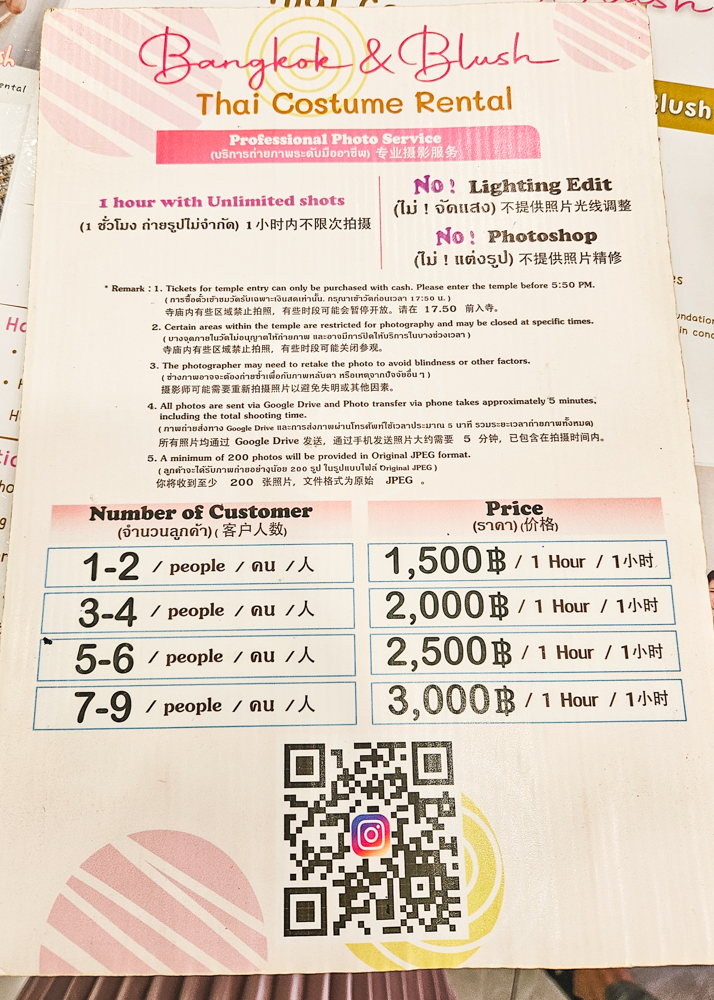
We booked the 3 Hour Costume Rental (200 THB), plus hair styling for Tahani (50 THB) and the basic makeup package for me (800 THB), and 1-hour photoshoot with unlimited photos (2000 THB for 3-4 people).
In total, we paid 3250 THB ($97 USD) for everything.
Bangkok & Blush Review
Arrival
We took a Grab taxi to Bangkok & Blush, arriving right on time for our 8am booking. The shop was just opening up so we were the very first customers there.
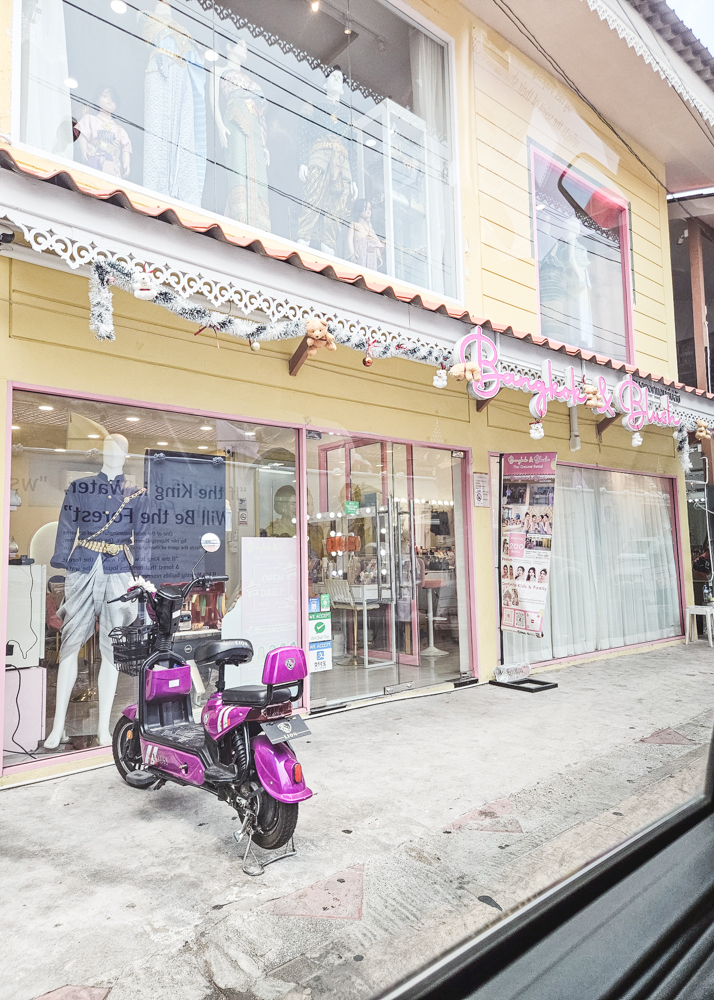
Upon walking in, we were asked if we had a booking. When we confirmed we did, they brought us upstairs to the costume studio and pulled up our booking. They re-confirmed which packages we wanted to book and any add-ons, then we paid the remaining fees online.
Choosing Our Thai Outfits
After processing our payment, they invited us to browse the wide selection of men’s, women’s and kids’ options.
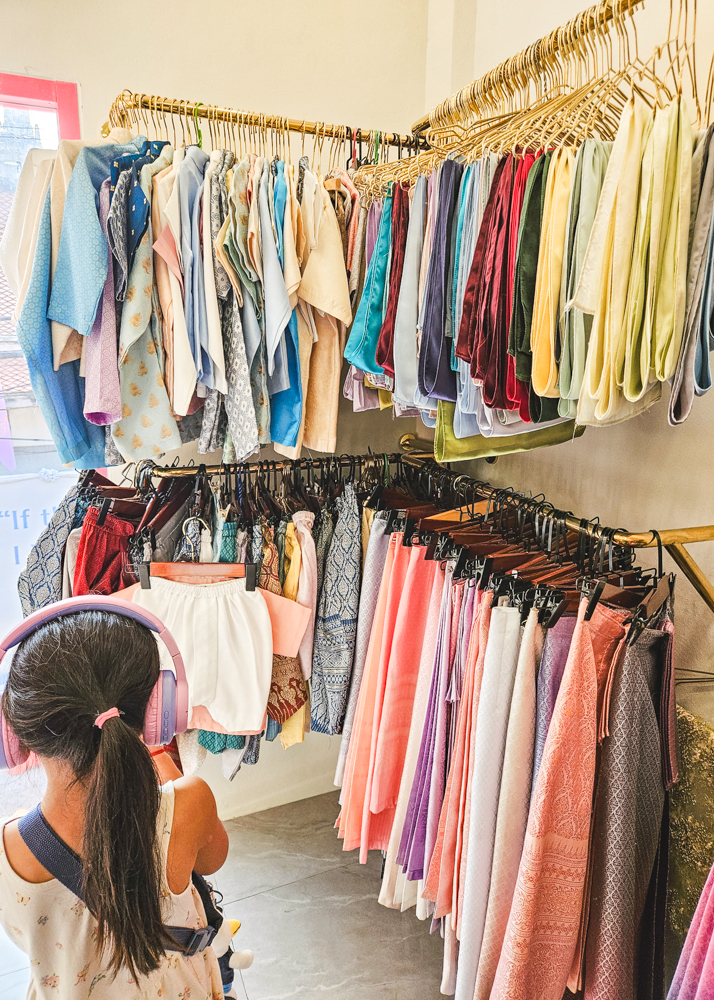
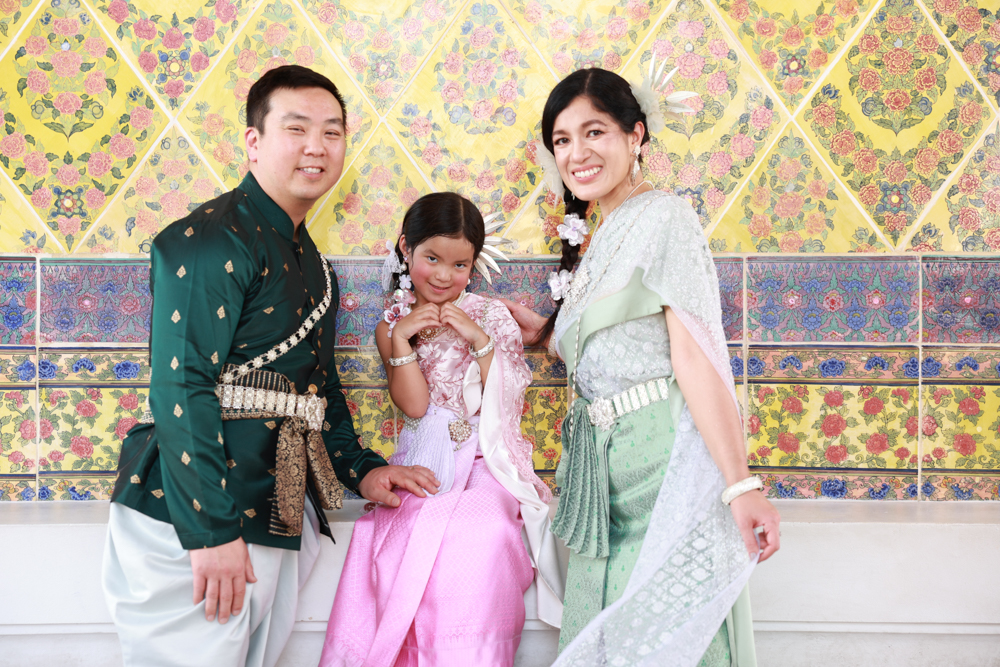
Our daughter went straight for a pink dress, whereas I was drawn to the greens, yellows and golds. It was hard to choose! There were so many beautiful colours and designs.
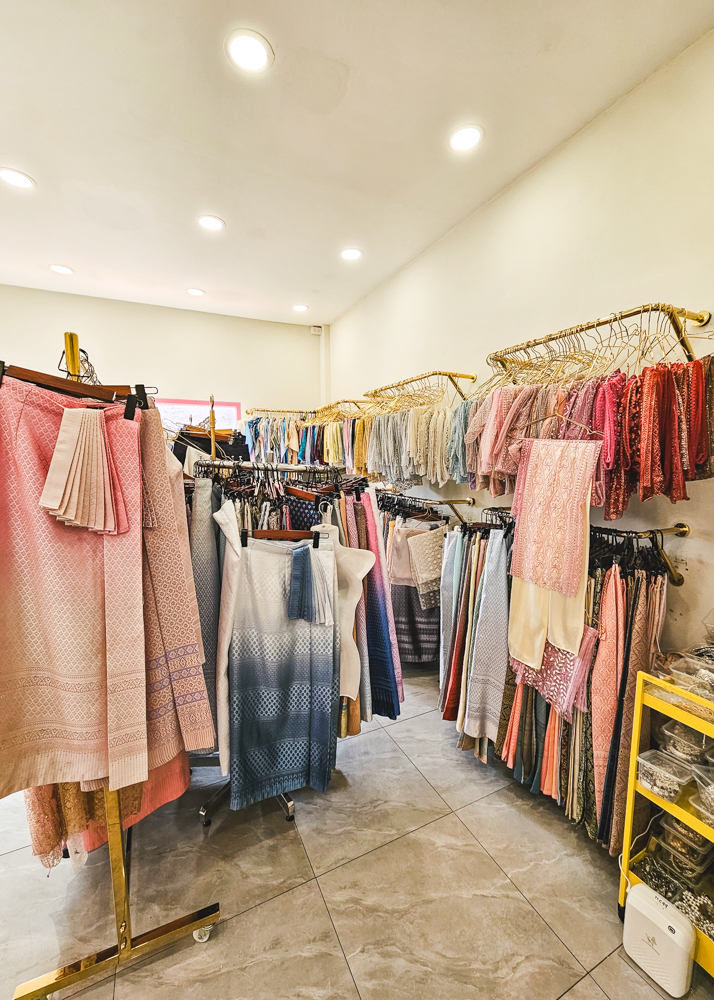
I ultimately went with a light green and Ryan went with a dark green.
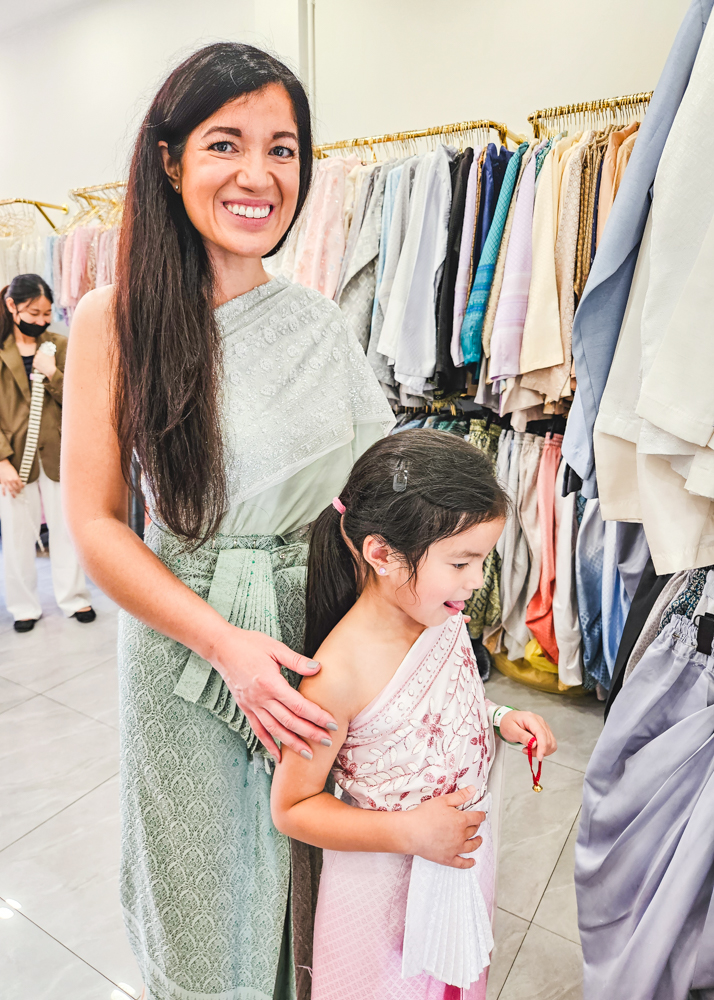
The staff helped us style the entire outfit, picking matching overlays and jewellery so that everything would match and complement each other.
Getting Dressed
After selecting our outfits, we were each directed to the changerooms and told to undress, leaving just our undergarments on. If you are uncomfortable with this, I suggest wearing a bodysuit and/or bike shorts underneath. I wouldn’t recommend wearing anything more than that as you will get way too hot under all the layers.
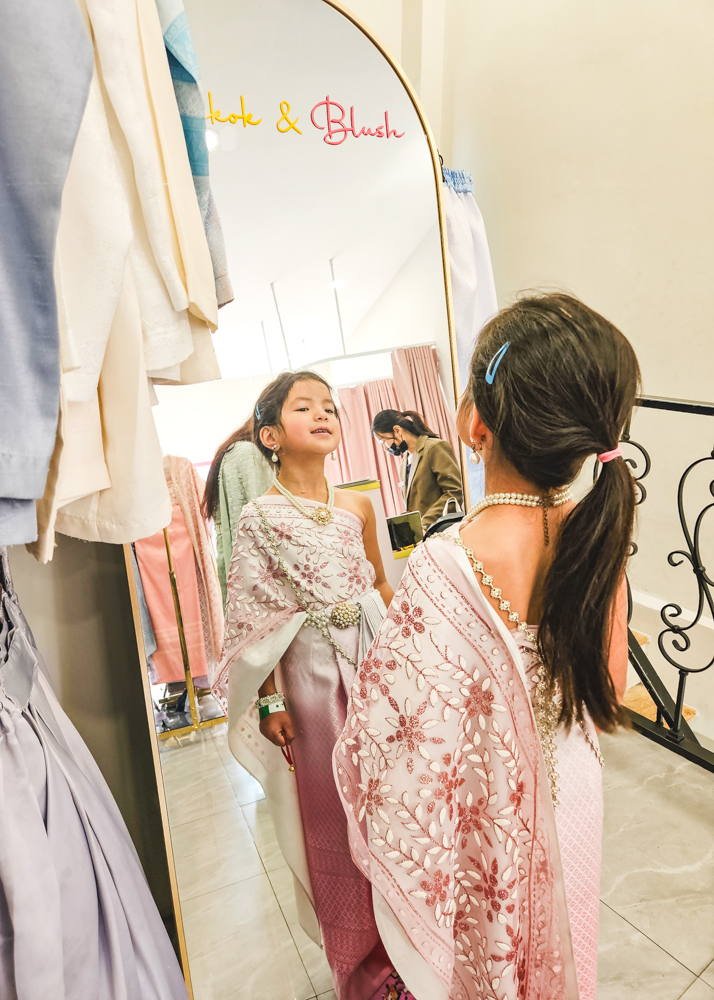
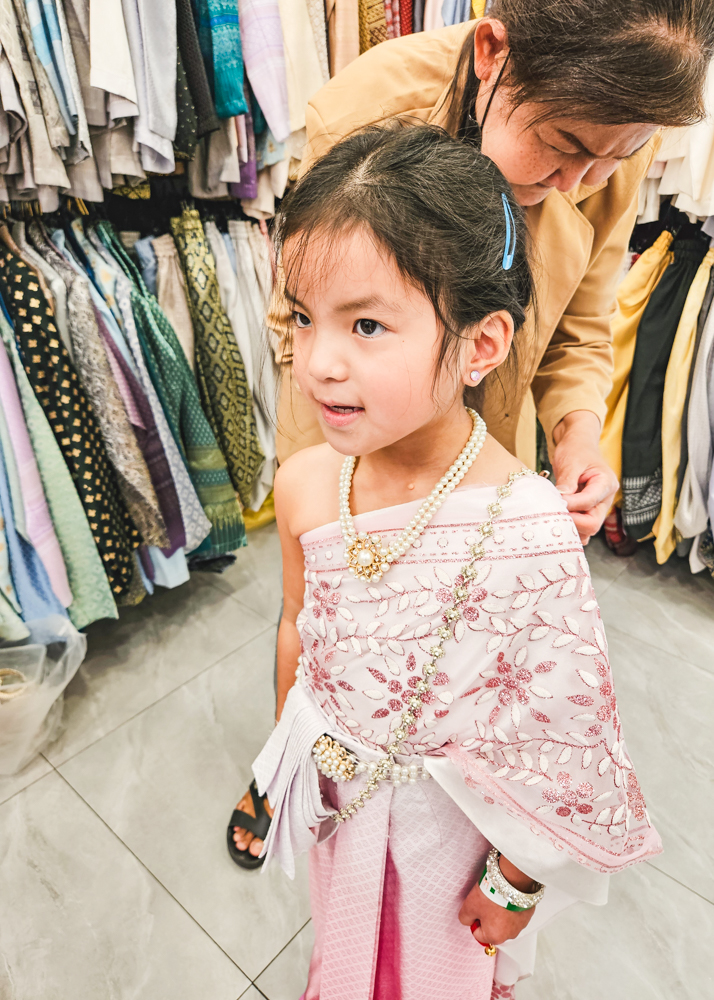
Once we were ready, one of the staff came in to help wrap the skirt and top around us and pin it so it fit just right. Then they adorned us with jewellery.
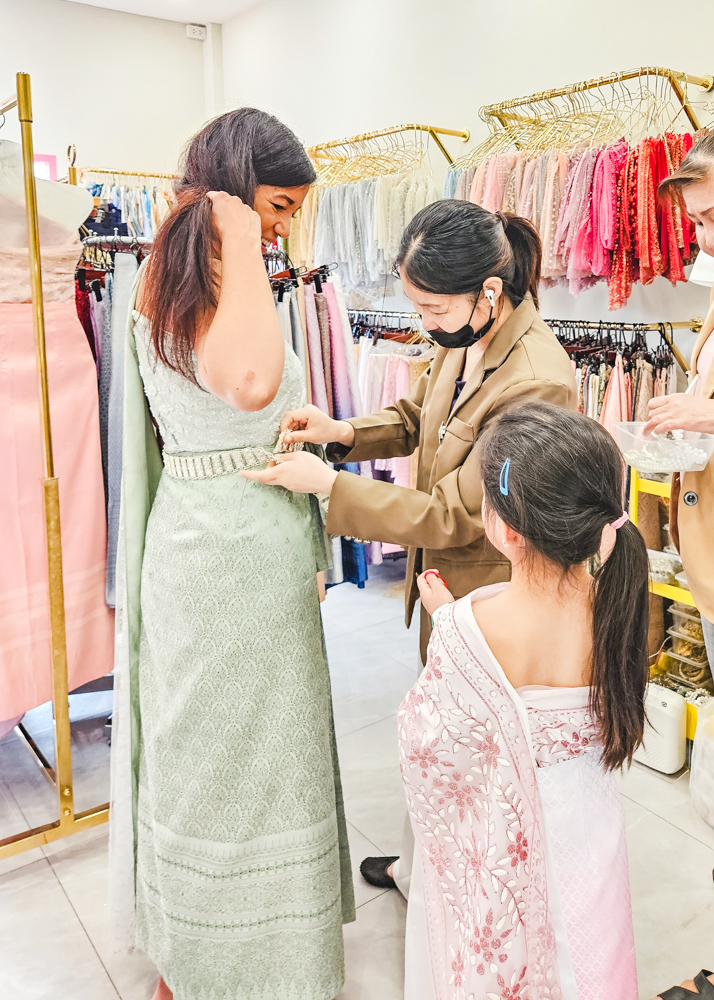
Ryan’s process was easier as he just had to put the pants and shirt on and then they decorated him with jewelled belts and a sash.
Hair Styling
Once our outfits were perfect, we headed back downstairs to the glam studio.
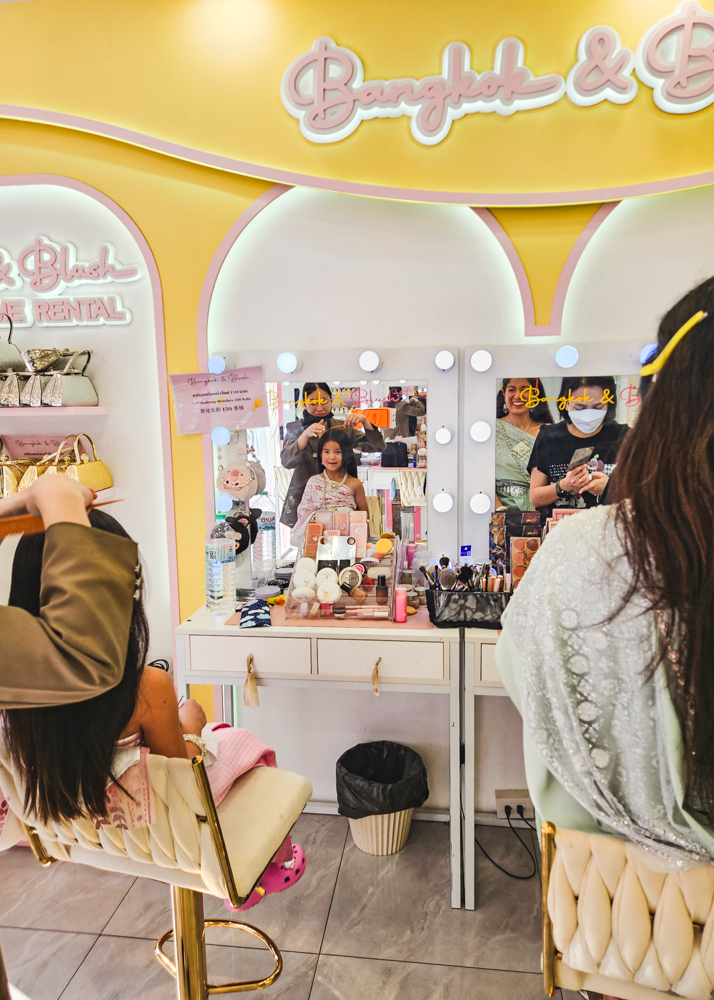
My daughter and I sat side by side with a hair stylist assigned to each of us. They gave us a menu with a few different hairstyles to choose from and asked us to select one.
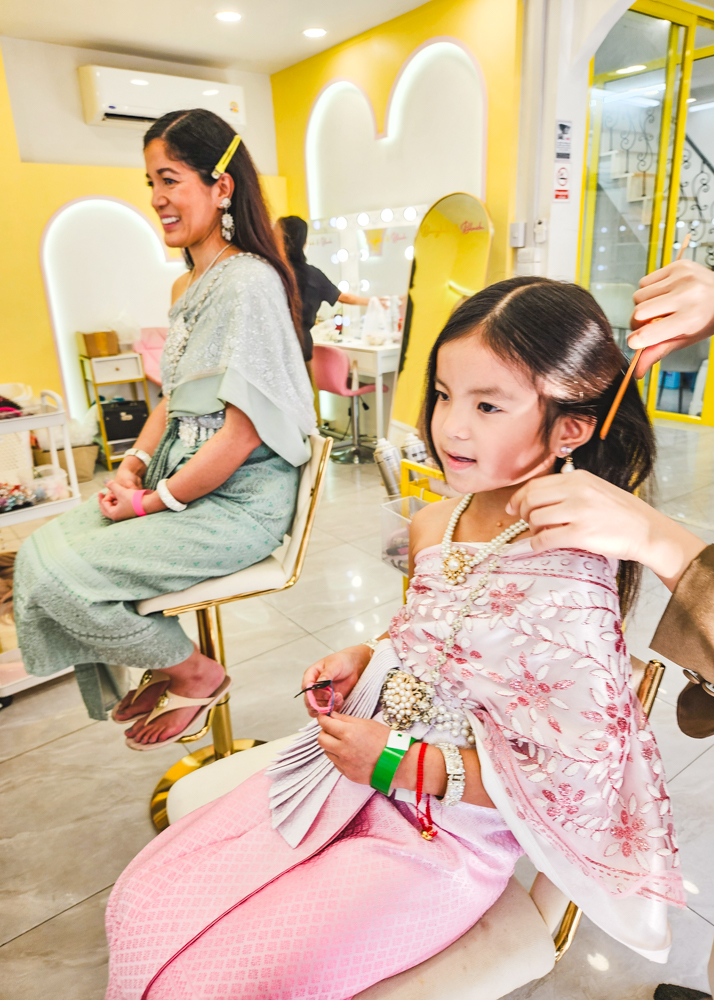
Ryan just watched as they said he didn’t need his hair done.
It was impressive how quickly they styled our hair. They even decorated our hair with cute accessories and gave us fancy clip-on earrings.
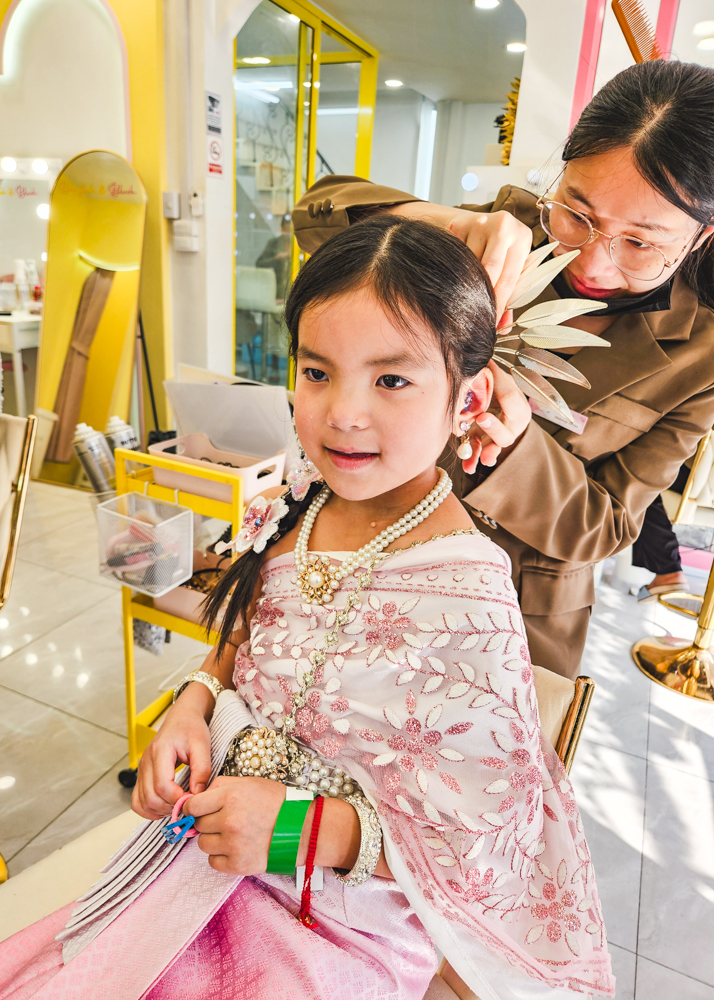
Makeup
Next, it was time for makeup. I originally wasn’t planning on getting it done as I had already done my own. However, they recommended it so I thought I might as well give it a try since it wasn’t too expensive anyway.
The makeup artist gave me a full face of makeup: foundation, blush, highlighter, lip liner, lipstick, eyeliner, eye shadow, brows. She took her job seriously and carefully applied everything. She was going to give me false lashes and mascara too but I asked her to skip it as I had already put on my own lashes.
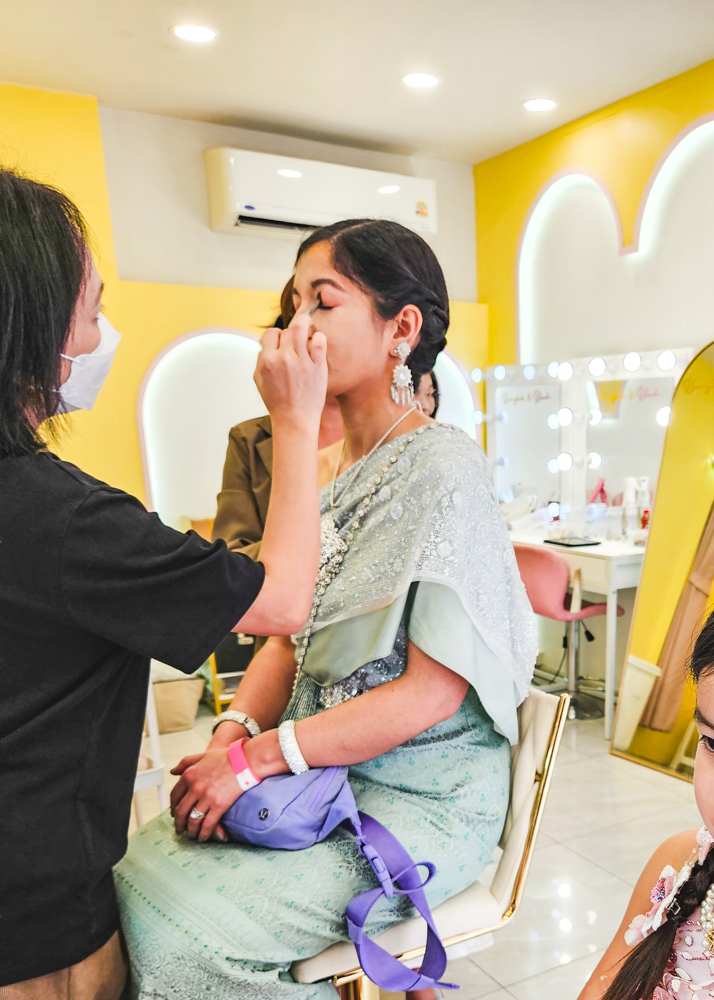
I personally didn’t love the foundation shade she chose as it was much lighter than my skin tone, so I looked much paler than I’m used to.
Honestly, I’d probably just skip the basic makeup package next time as I know how to do it myself so it wasn’t really necessary. However, for any ladies who don’t normally wear makeup or don’t know how to apply it well, this basic makeup package is a great option and will complete the look. I saw many ladies who were very happy with their makeup!
Accessories
Finally, they chose a fancy small purse to go with my outfit and gave Tahani an umbrella to bring along.
Once we were completely ready, we placed our personal belongings in the lockers and waited for our photographer to arrive at 9:30am.
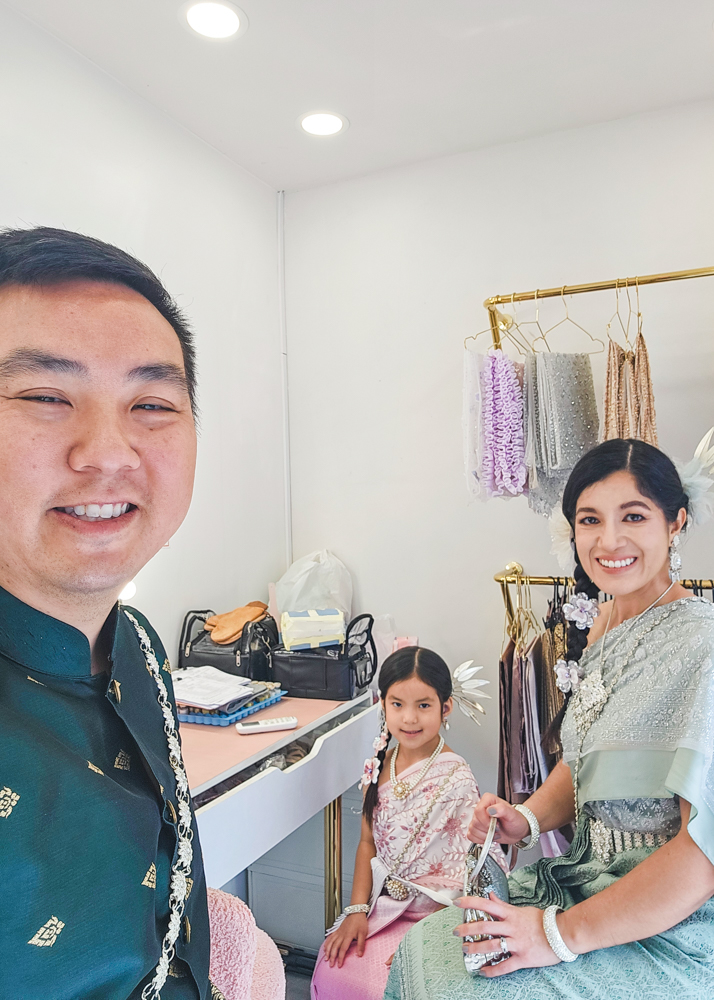
The Wat Arun Photoshoot
Once our photographer arrived, she walked us over to Wat Arun, just a 2-minute walk (150 metres) away. Ryan and I paid for our entrance fees – Tahani was free. We were also given bottles of water, which was a welcome surprise.
Our photographer led us all around the site to the most photogenic spots. She guided us on how to pose, which we really appreciated!
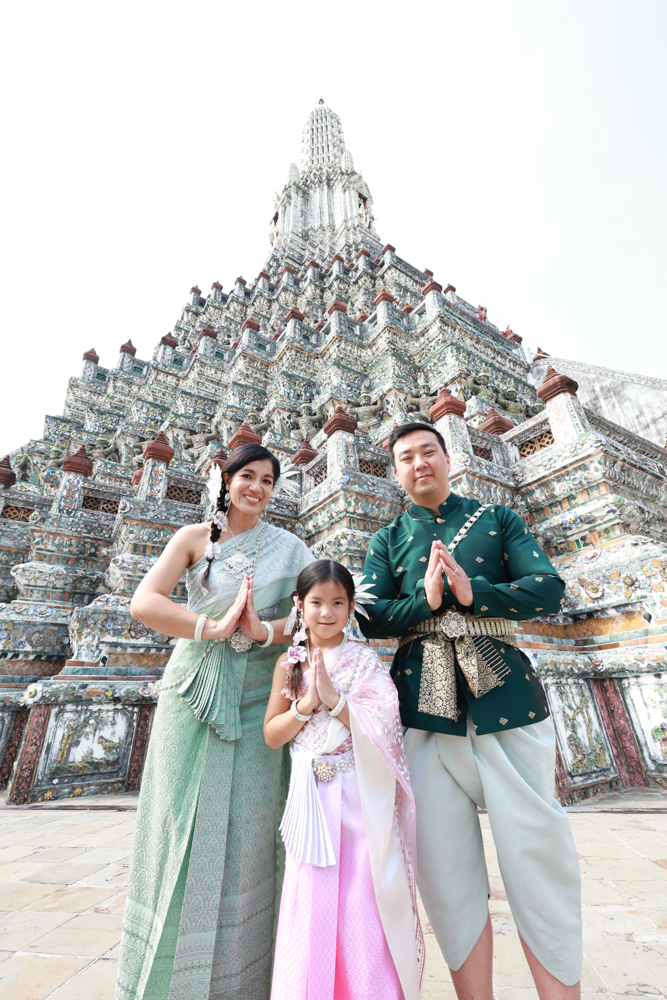
She captured many creative shots – ones that we would not have thought to take ourselves. We especially loved the beautiful shots she got with the umbrella as a prop.
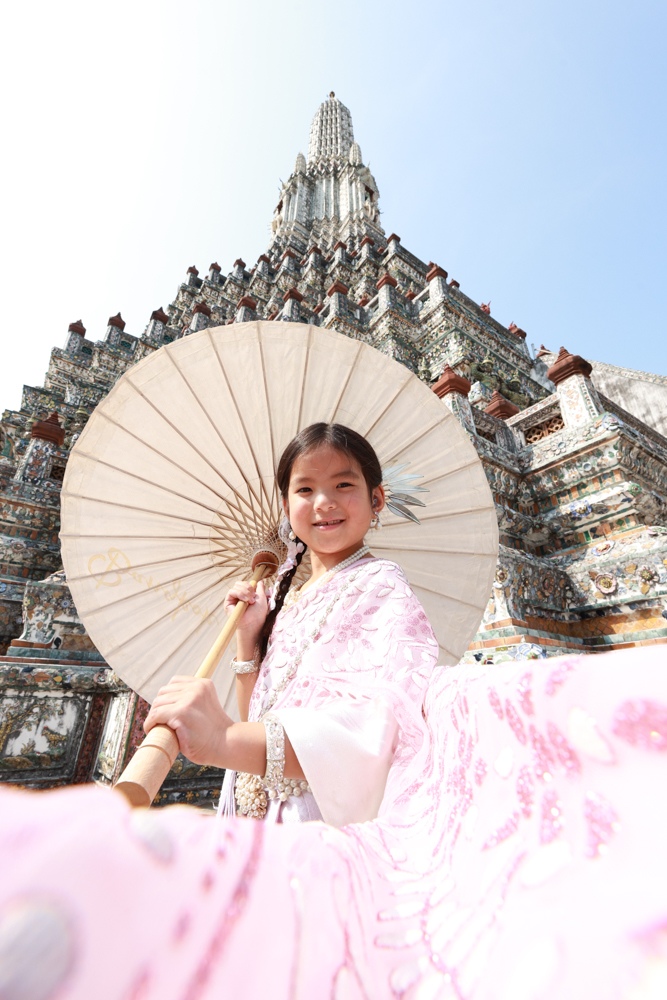
The temple was pretty crowded, with lots of other groups doing photoshoots. While waiting our turn at some of the popular spots, our photographer was mindful of us not getting too hot. She instructed us to stand in the shade and gave us powerful electric fans. It was so thoughtful of her to bring fans for us – they were definitely great to have!
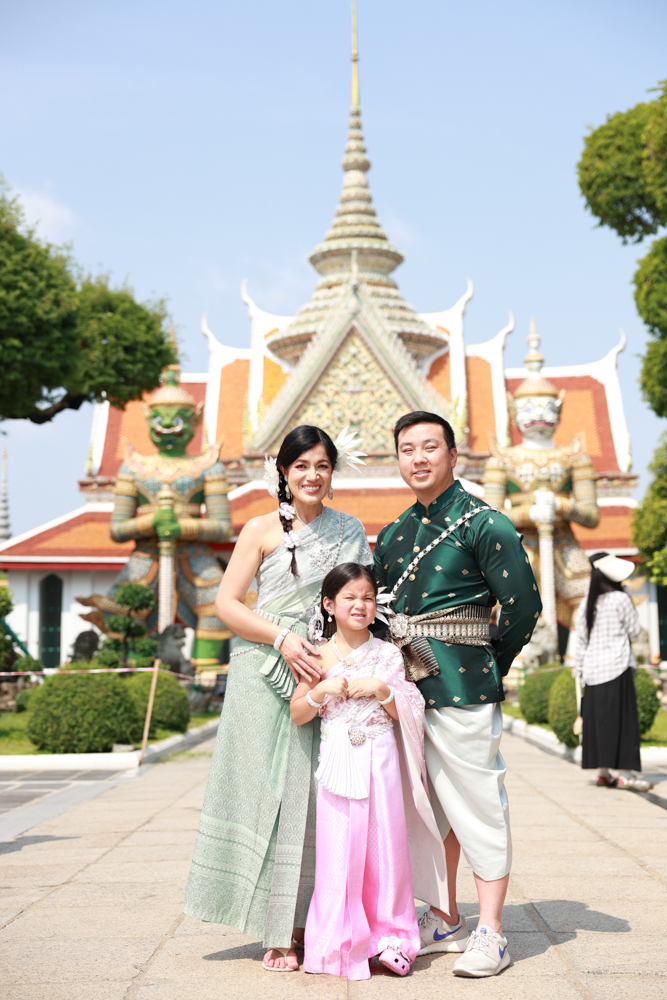
We were so grateful to have chosen the first photoshoot timeslot of the day as it was already getting scorching hot at 10am. With the added layers of the dresses, and Ryan in a long sleeve shirt, combined with lots of walking around the temple grounds, it was quite the hot and sweaty morning.
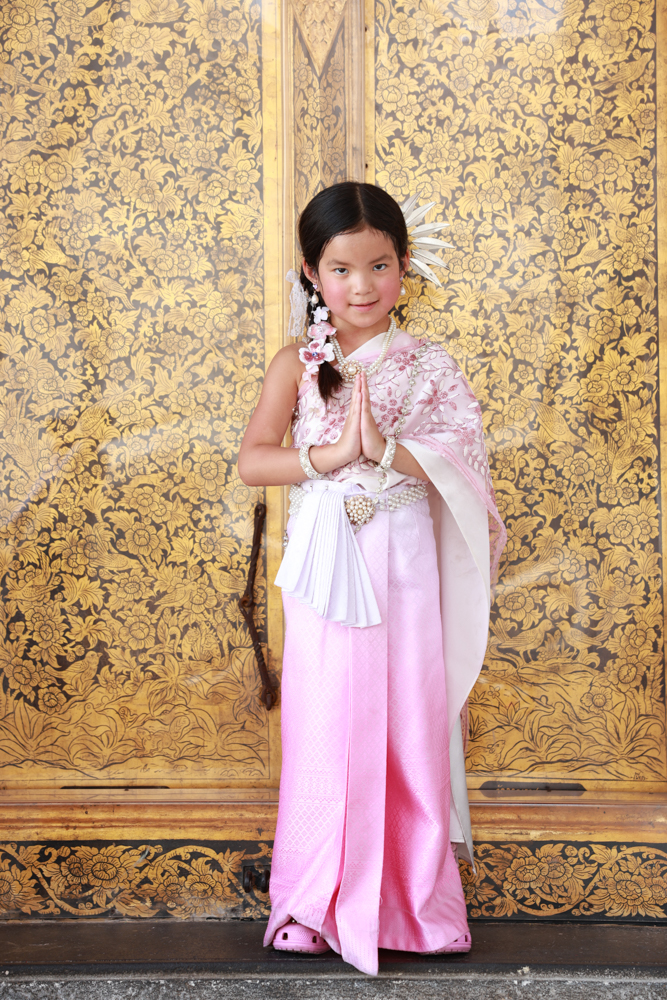
By about 10:45am, we finished up our photoshoot. Our photographer asked if we wanted to stay at Wat Arun to explore more on our own, or head back to the shop with her. By this point, we were really needing a break from the heat so we elected to head back rather than see more of the temple.
The Photos
Back at the shop, our photographer asked for my phone to download all of the photos from her camera directly onto my phone. Luckily, I had enough storage space on my phone. If I didn’t, I’m not sure if there was another option for receiving the photos, but I’d hope so.
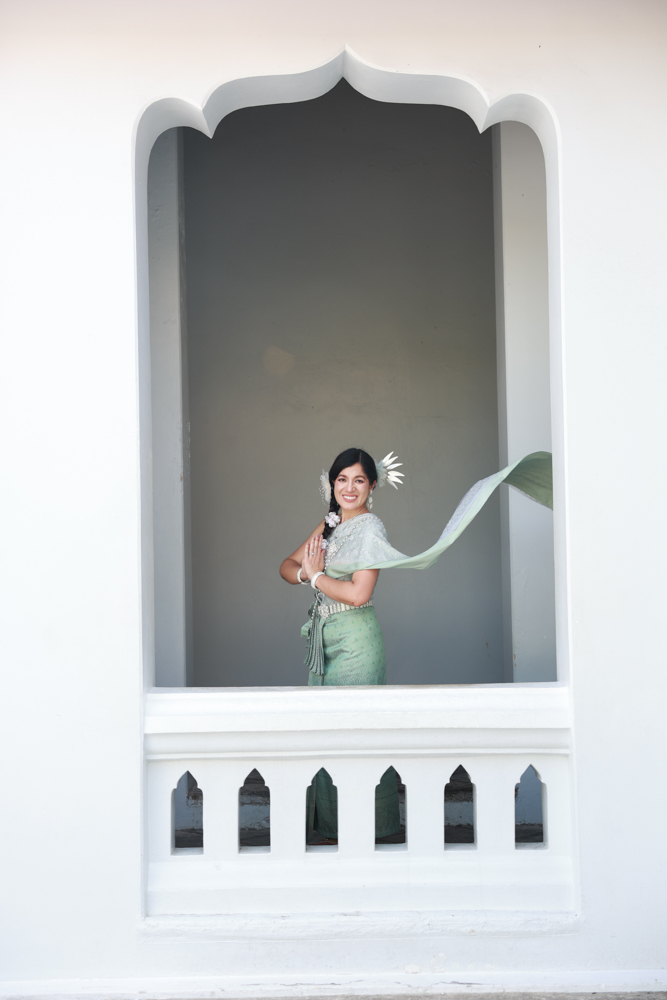
I was pleasantly surprised to receive over 300 photos! She gave us everything she took, which was nice. Obviously, they weren’t edited, since they were straight from her camera, but it did look like she used a filter.
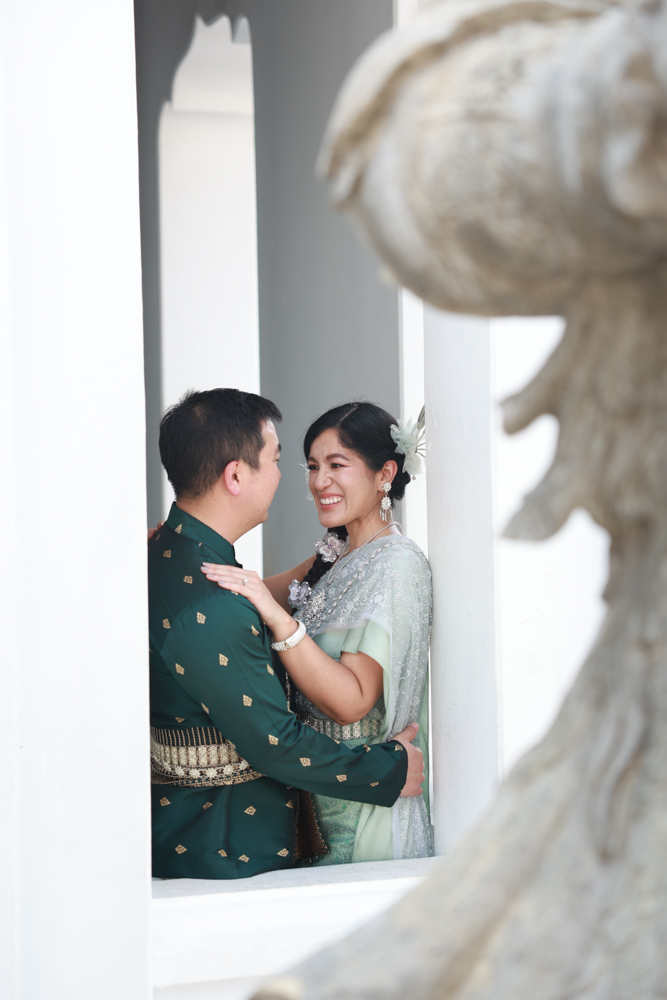
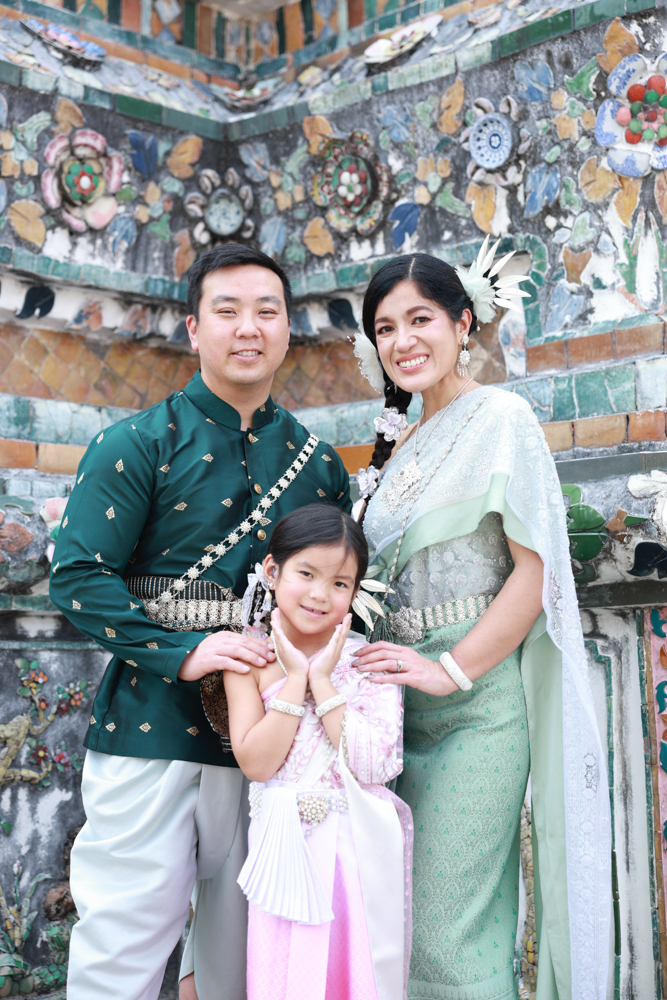
We were very happy with how the photos turned out. For $60 for the 1-hour photoshoot plus 300+ photos, it was excellent value.
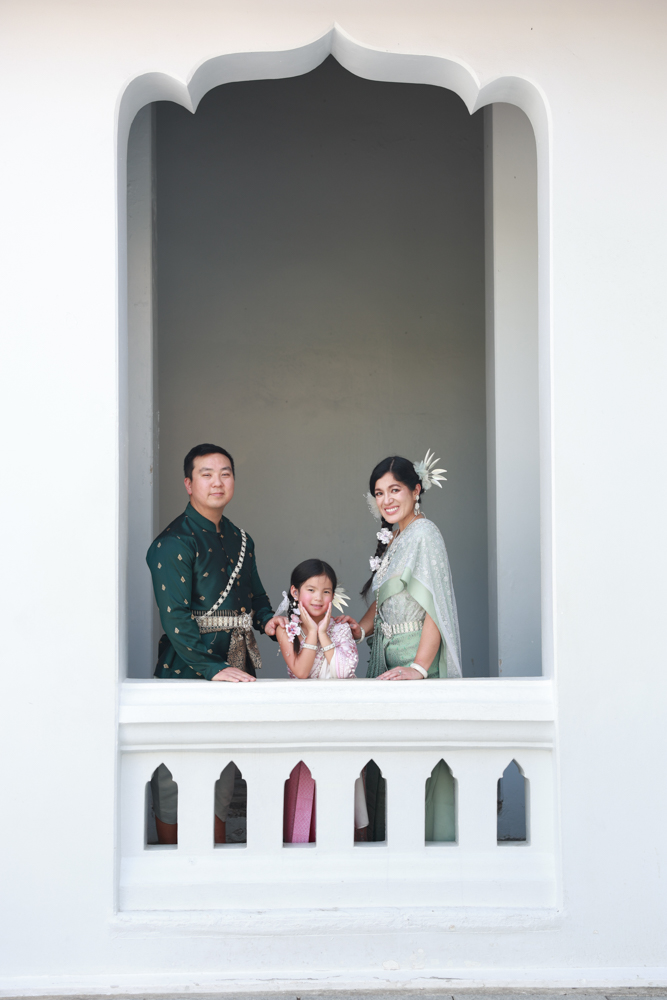
Visiting Wat Arun With Kids
Our daughter loved getting dressed up in the elaborate Thai dress. She exclaimed she felt like a princess. Despite the intense heat, she surprisingly didn’t complain too much. I think this was largely because we went as early as we could, had water for her to drink, an umbrella to shade her and strong electric fans which she used between takes.
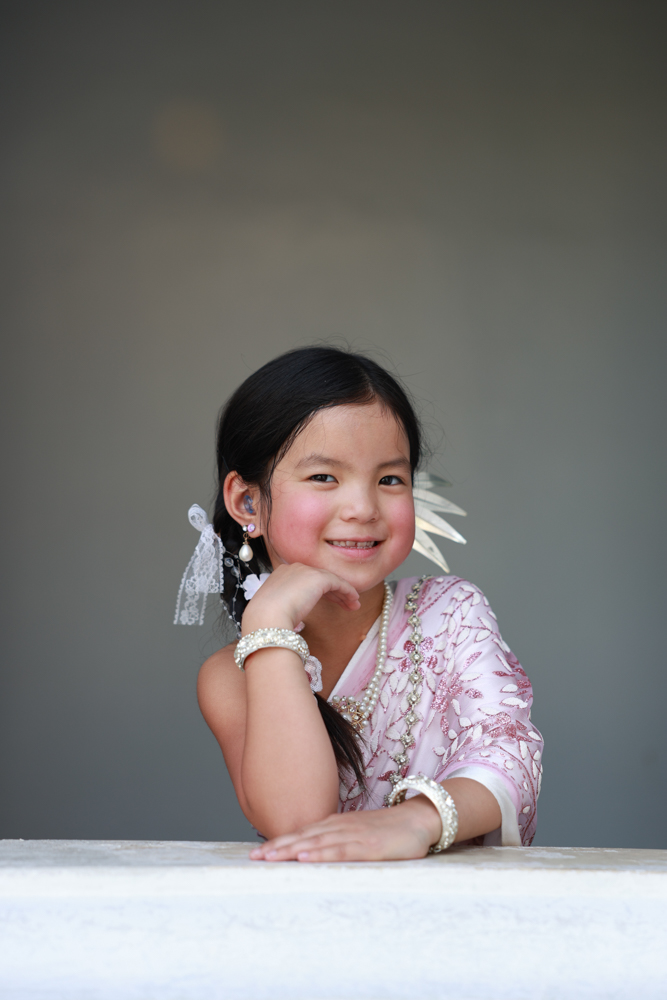
If you’re visiting Wat Arun with kids, especially for a photoshoot, go as early or as late as possible.
What We Loved
We were very happy with Bangkok & Blush for our Thai costume rentals and Wat Arun photoshoot. The staff were so kind, the shop was bright, modern and clean, and there was an excellent selection of costumes. Our photographer was professional and made us feel comfortable.
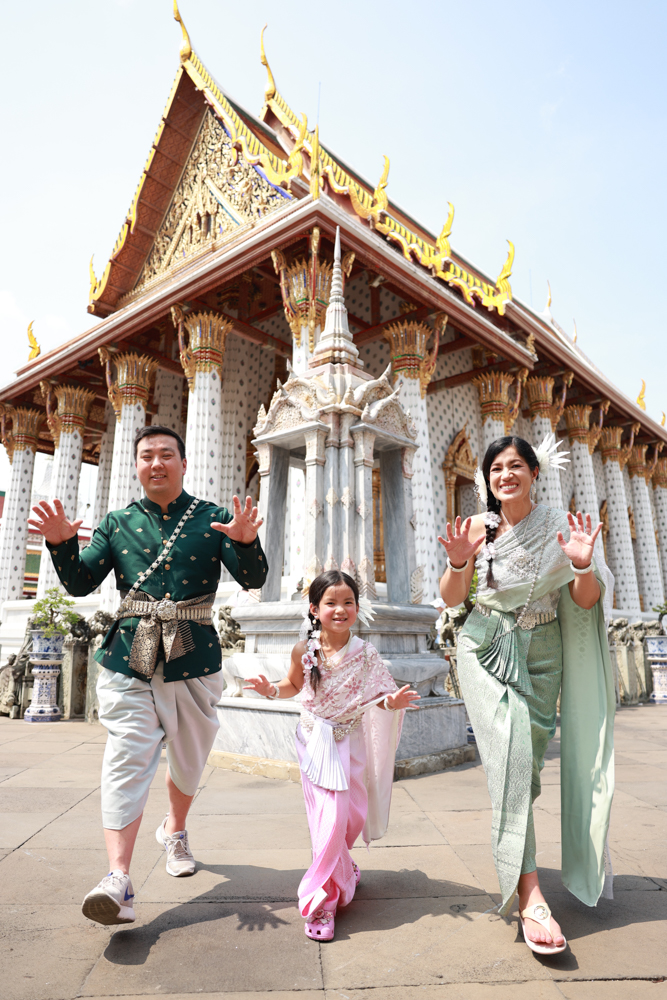
I think what we appreciated most was how they kept us feeling cool. The shop has good air conditioning which was very important while getting dressed. And the fact that our photographer brought electric handheld fans for us was so nice as well.
The Bangkok & Blush shop is also very conveniently located to Wat Arun and is just a short walk away. This is perfect so you don’t have to travel far while in costume in the heat.
What We Didn’t Love
Our only real complaint was the heat. I wish we could have started our shoot even earlier than we did, right when the temple opens at 8am. But I couldn’t find a rental shop that opens earlier than 8am so it’s not really possible.
Is a Wat Arun Photoshoot Worth It?
Definitely! Getting hundreds of lovely photos with one of Bangkok’s most iconic landmarks as a backdrop while in traditional Thai dress, with hair styled and makeup done, for under $100 USD is incredible value. It was one of our favourite family experiences in Bangkok.
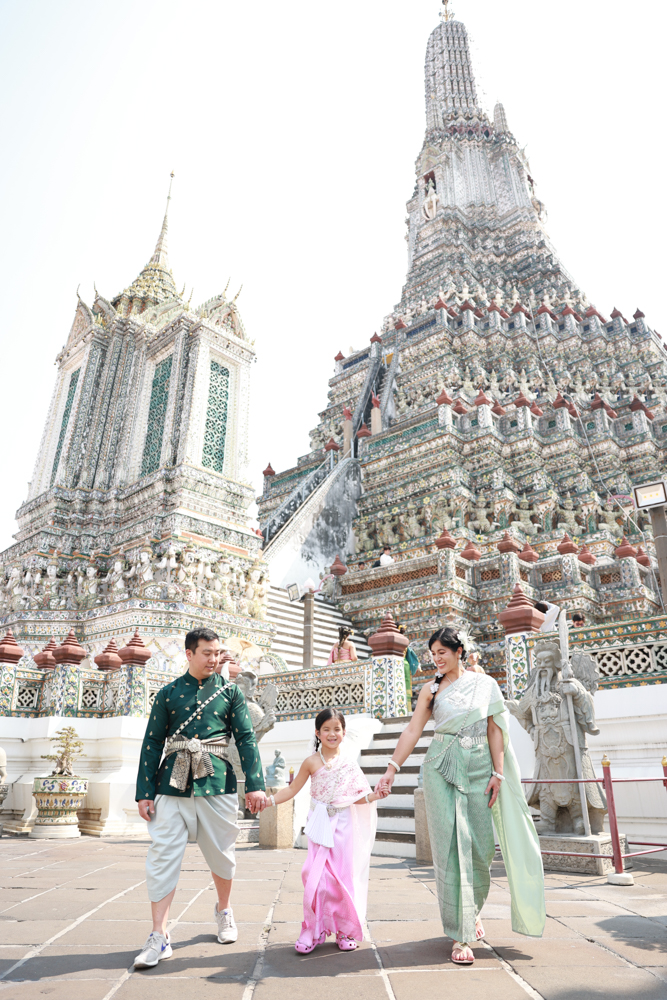
Not only did we get to see a stunning, historic Thai temple up close, but we also came away with such beautiful photos to treasure as memories of our Thailand trip.
Tips For Your Wat Arun Photoshoot
- Bring cash for the Wat Arun entrance fee (200 THB per adult – not included as part of the photoshoot fee)
- Ladies, wear a strapless bra as the traditional Thai dress leaves one shoulder open
- Wear shorts underneath if you’re uncomfortable being in your underwear while the staff help you get dressed
- Wear dressy shoes/sandals as they are not included in the costume rental and your feet will show in the photos
- Borrow/Rent one of the costume umbrellas to use for shade and as a photo prop
- Book it for early morning or late afternoon to avoid the worst of the heat
- Ensure your phone has enough storage space to download the photos after or bring an extra SD card
FAQ
How much does a Wat Arun photoshoot cost?
For a 1-hour photoshoot, it’s 1500 THB for 1-2 people, 2000 THB for 3-4 people, 2500 THB for 5-6 people and 3000 THB for 7-9 people.
If you just want to rent the Thai costume and take your own photos, it’s only 200 THB/person for a 3-hour rental or 700 THB for all day.
Can children do a Wat Arun photoshoot?
Yes! The Thai costume rental shops have kids sizes available. And the photographers were great at capturing kids and had adorable poses for them.
Do you need to book a Wat Arun photoshoot in advance?
No, there are plenty of shops lining the streets outside of Wat Arun. Many will accept walk-ins. However, the most popular shops (with AC, nice interiors and lots of selection) will likely be booked up. If you want to ensure you get a good timeslot without a long wait, and first pick of outfits, book in advance.
How early should you arrive?
Aim for 8am to get first dibs on the outfits, beat the crowds, and the heat.
Can you visit Wat Arun without a photoshoot?
Yes! You can visit on your own (just remember to respect temple rules for attire and have your shoulders covered). You can also just rent a traditional outfit without paying for the photographer.
Do you have to hire a photographer or can you take your own photos in the traditional Thai dresses?
No, you don’t need to hire a photographer. You can definitely just take your own photos. However, it’s much easier with a photographer as they know all the good spots and how to navigate the crowds.
What should you wear under a traditional Thai costume?
Wear as little as possible underneath as you will get quite hot with multiple layers. Just wear your undergarments, if possible, or a thin layer.
Click here to read our full Privacy Policy and Affiliate Disclosure Statement
More Thailand posts:
- Review: The Naka Island, a Luxury Collection Resort & Spa in Phuket
- Review: Island Escape by Burasari Phuket – Our Family’s Honest Experience
- AirAsia Review: What It’s Really Like Flying Asia’s Budget Airline
- Bangkok to Ayutthaya By Train – Our Easy DIY Day Trip
- Bangkok Unicorn Cafe – Is It Worth Visiting?
- Bangkok with Kids: Our 3-Day Bangkok Itinerary for First-Time Visitors
- Review: Andaz One Bangkok – Our Family’s Stay at Bangkok’s Newest Luxury Hotel
You might also like:
- 1-Day Tokyo Disneyland Itinerary – Perfect for a layover with kids!
- One Day in Kuala Lumpur – Layover Itinerary
- Two Days in Singapore Itinerary: How to Maximize Your First Visit!
Pin Wat Arun Photoshoot!

Leave a reply